Day 10 Homework

Holiday Card Workshop 2022 – Interactive Cards

Jennifer McGuire’s lesson on day 10 was to create an interactive Santa shaker card with a twist. Using a piece of recycled stamp bag and by not cutting off the opening but rather the bottom portion to enclose your cardstock you can add a gift card that the recipient can easily or very easily remove without destroying the card. The tip is to adhere the shaker panel to the card base except you adhere the flap to the inside of the card base. The flap has enough sticky on it to be able to open from the inside and fish out your gift card. I was lucky enough to find a stamp set not yet removed from the packaging and was very close to A2 size. The hardest part was removing the store label (Michaels) from the outside of the packaging. My Santa is ephemera from Michael’s, HO HO is Spellbinder’s and my background was one not used from a previous class.

The alternate class by Channin Pelletier was a pull tab present card. I’ll put it on my to do list but definitely must hop to my Christmas cards.
I enjoyed my Holiday Card Workshop. Our grandson’s baptism was beautiful and we had a great time with our family and our son’s friends. Thanks for stopping in for a peek. I appreciate you and your time. Take care and stay safe.

P.S. We prepped for winter — shrubs and flowers all cut back, patio furniture stored away in shed, snow shovels and snowblower in place. Only thing left to do is to paint the zoysia grass. LOL.
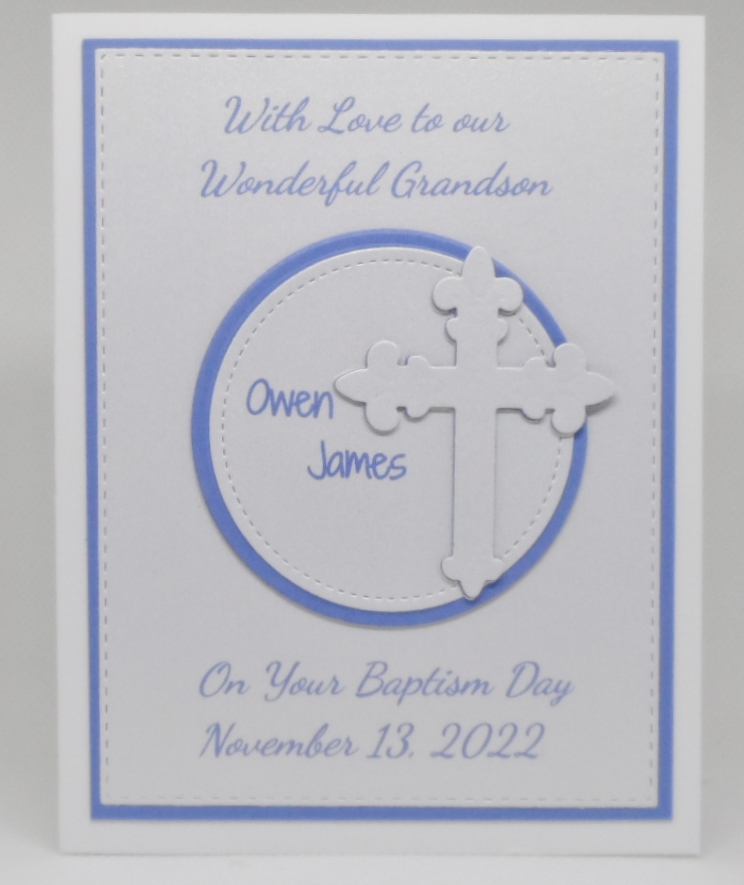
Owen James

My card today is for our youngest grandchild. Owen is 3 months old (already) and is getting baptised on Sunday.

It’s a special time for all of us. I’m taking a “sick” day from Holiday Card Workshop classes tomorrow to help with preparations.

Thanks for stopping in for a peek. I appreciate you and your time. Take care and stay safe.

Day 9 Homework

Holiday Card Workshop 2022 – Day 9 – Snowflakes

Today’s class by Kristina Werner instructed us to create a Faux Embossed Snowflake background by die-cutting snowflakes and stacking four on top of each other for dimension. My faux embossed snowflake background is more of an older style embossing folder instead of the 3D embossing folders since I only stacked 2 snowflakes. LOL. Snowflakes, and focal layer are cut from shimmer paper and Joy die cut was layered and topped with a scrap of glitter cardstock. I needed a pop of color.

The second session by Caly Person was a beautiful Snowflake Easel card. That will need to wait for another day.

Thanks for stopping in for a peek. I appreciate you and your time. Take care and stay safe.

Day 8 Homework

Holiday Card Workshop 2022 – Day 8 Foiling

Day 8 classes were all about foiling. Yana Smakula instructed hot foiling using the glimmer machine and the different types of paper to use and other useful tips. Beautiful cards but I don’t have a Glimmer and won’t be making the investment into one. Yana’s cards are always beautiful and I enjoyed her presentation.

The alternate class was taught by Gina K and this one I could participate in as I do have decofoil, deco transfer gel and toner sheets. I don’t do a lot of foiling because it is usually hit or miss with the foil but my top card was made using SSS In the Round stencil, transfer gel and then cutting strips of green and red foil, layering them across the dried transfer gel and send through the laminator. The bottom portion was also foiled using foil on a transfer sheet. My Santa is from an ephemera pack I picked up at my local Michael’s. The pack was all inclusive of a dark toned Santa and a light toned Santa. I thought this Santa was extra cute and he was standing the correct position for my card. Inside card has a layer of patterned papers with the works HoHoHo throughout.

My second card was made with toner sheets. The striped was one from Gina K/ThermoWeb a few years ago but the small panel was made using the foiled sheet on a toner sheet and running it through in two different directions to create a trellis like effect. I added another piece of ephemera to an oval vellum die cut to complete my card. The only method that was a FAIL was stamping snowflakes in versamark, heat embossing, inking and running through the laminator with foil. I only achieved partial foiling.

Another fun class. Thanks for stopping in for a peek. I appreciate you and your time. Take care and stay safe.

Day 7 Homework

Holiday Card Workshop 2022

Day 7’s sessions were all about embossing folders. Koren Wiskman’s session was Spotlight Ink Blending + Embossing Folders. Using SSS A2 Masks, I ink blended Distress Oxide inks in Twisted Citron, Mowed Lawn and Rustic Wilderness going from light in the center to dark outside. This panel was then run through my Big Shot (still working with protest — LOL) using SSS Holiday Greenery embossing folder. The die cut sentiment is Spellbinders and added a SSS Christmas Foilage die in red. The embossed panel is very subtle but it’s nice that the entire panel is embossed.

The “extra credit” session was presented by Laura Bassen in which to create an ink blended pattern + embossing folder. For this card, I went back to a Taylored Expressions Plaid stencil using DO Evergreen Bough, Festive Berries and Black Soot. My first thought was to use versamark and gold embossing powder on the black lines but I was too impatient to wait for the ink to dry so went with black soot.

The embossing folder is from Sizzix. I embossed a piece of white card stock and fussy cut the center section of this embossing folder and adhered it to my card front. The stamp set is AI Penguin Joy and how surprised was I when my upper and lower flourish nestled the sentiment very nicely. Using the same inks, I added color to the holly and berries.

A very traditional Christmas color day for me. I think I like the second plaid card the best and, wow, I actually think my lines look straight. It was a good day!

Thanks for stopping for a peek. I appreciate you and your time. Take care and be safe.

Day 6 Homework

Holiday Card Workshop 2022

Today’s classes were all about Tiny Stamps. My card today is a CASE of Kristina Werner’s card to create a circle stencil for the background. I decided on softer inks in SSS Seafoam and GKD’s Lovely Lavender and Bubblegum pink. I searched my stash for tiny stamps and while I may have had bits and pieces on several stamp sets the Stampin Up Merry Crittermas stamp set was the only one that carried the same theme. After stamping, coloring and fussy cutting, I added them to my card layering on a piece of pink cardstock but inking the edges with bubblegum pink ink. The alternate class by Chari Moss was Teeny Tiny Backgrounds. She had great samples but I had an extra busy day so my extra credit did not get completed. LOL.

Thanks so much for stopping in for a peek. I appreciate you and your time. Take care and stay safe.

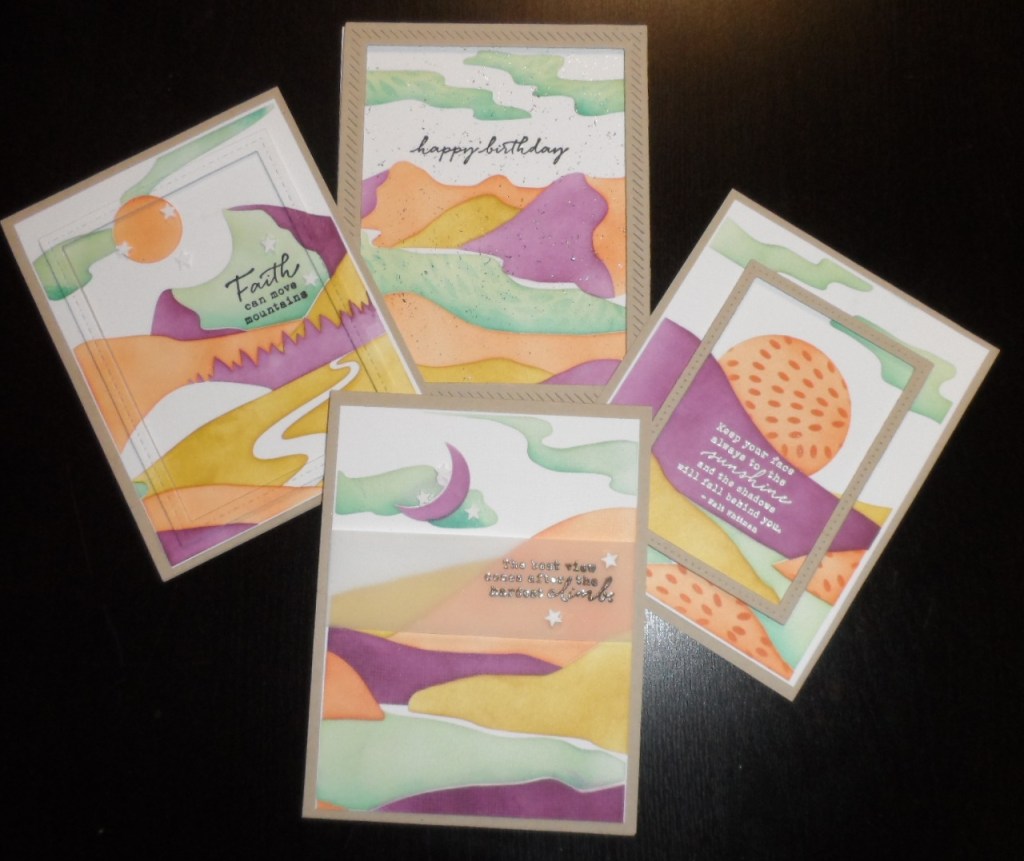
scenic Route Quad

I signed up for the Taylored Expressions Stamp Joy Fall on line stamp class. The class included this Scenic Route Quad stencil. So much fun to use these quad stencils. Four different stencils and when you are finished ink blending you have four different backgrounds. Very clever. On two of the backgrounds, we used a second stencil to ink in the same color on a section of the quad and the technique for the Happy Birthday card is to lightly spray that background after ink blended and cut apart with Pixie spray then take a piece of foil (the type for a laminator) and lay it on top lightly pressing on the foil. It leaves little bits of foil on your background. So no splatter needed. It was a fun class and I enjoy working with these quad stencils. Now I need suggestoins for different inks.

Thanks for stopping in for a peek. I appreciate you and your time. Take care and stay safe. Baseball is officially over and although my Phillies didn’t win the World Series…wow….what a season those underdogs have given Will and myself.

Bonus Day Homework

Holiday Card Workshop 2022 – Saturday Bonus Day — Using Leftover diecuts!

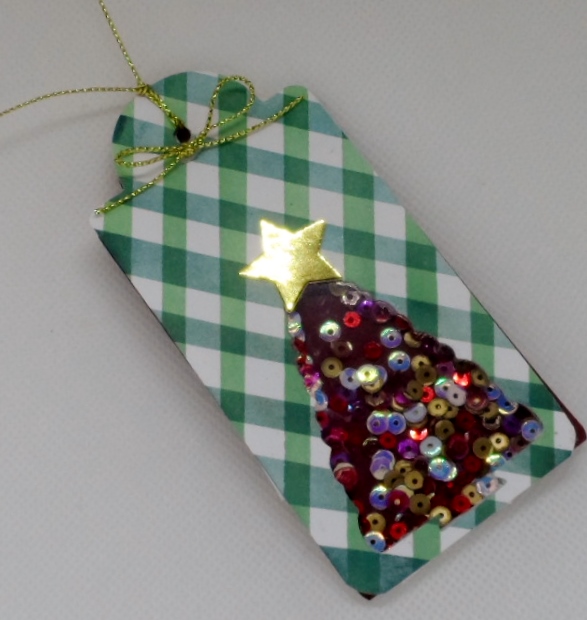
Kristina Werner’s bonus class this morning instructed us on how to use leftover diecuts. Day 1 was all about plaids and I had cut down a portion of my plaid to die cut a tree to be used on that card. However, that was pretty much a fail but I held onto the piece of plaid with the tree die cut out of it and opted to use it for my shaker tag. I die cut my panel in the plaid and a scrap piece of red card stock, added a shiny die cut star from scraps on my work area to complete this tag. So far no sequins have escaped.

Thanks for stopping in for a peek. I appreciate you and your time. Take care, stay safe. Let’s Go Phillies!!!

Day 5 Homework

Holiday Card Workshop 2022 – Day 5 Using Scraps

Our class today which was instructed by Jennifer McGuire and our challenge was to Use Scraps. She gave us sampels making paper folded trees, ornaments and gift packages using our scraps. I decided to make the folded ornament on my card using four different shades of cardstock scraps, folding and then gluing them to a smaller circle die, stamping and gold heat embossing. I found a topper die, and a bow die and die cut from scraps. My background was made using an arched stencil and some splatter. Sentiment strip from GKD, I think.

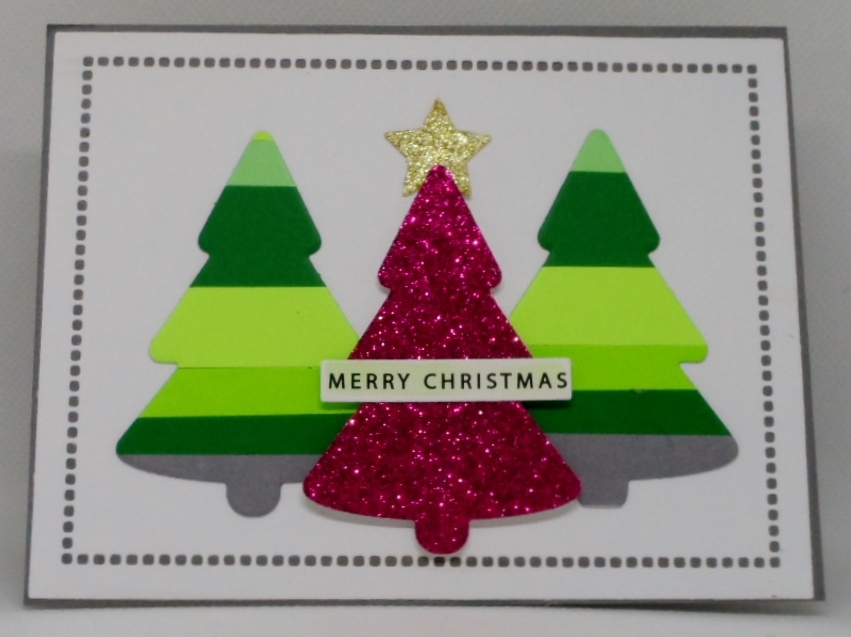
The second instructor, Koren Wiskman, created Striped Christmas Trees using paper strips in various sizes and adhering to a piece of copy paper then die cutting. I added one glittery tree and a star cut from scraps too. I have enough striped paper to die cut at least 2 more trees. Tree die was Her Arts Joann’s Kit.

Another fun day in school. Homework and extra credit completed. It’s Fri-YAY! Thanks for stopping in for a peek. I appreciate you and your time. Take care, stay safe.