A fifth Saturday at Just Us Girls means it’s Wild Card Week. The Wild Card is to use two or more different pattern papers. The two patterns are from a patriotic pack by Authentique that’s been in my stash for a long time. I put the fireworks pattern on the top and the stars and stripes on the bottom. I found the shiny red textured strip in my stash. The die used to cut the Kraft USA map is from the die set that matches the Old Glory stamp set from the Stamp Simply Ribbon Store. The sentiment is from the same set, stamped in Blue Denim. The card base is also Kraft.
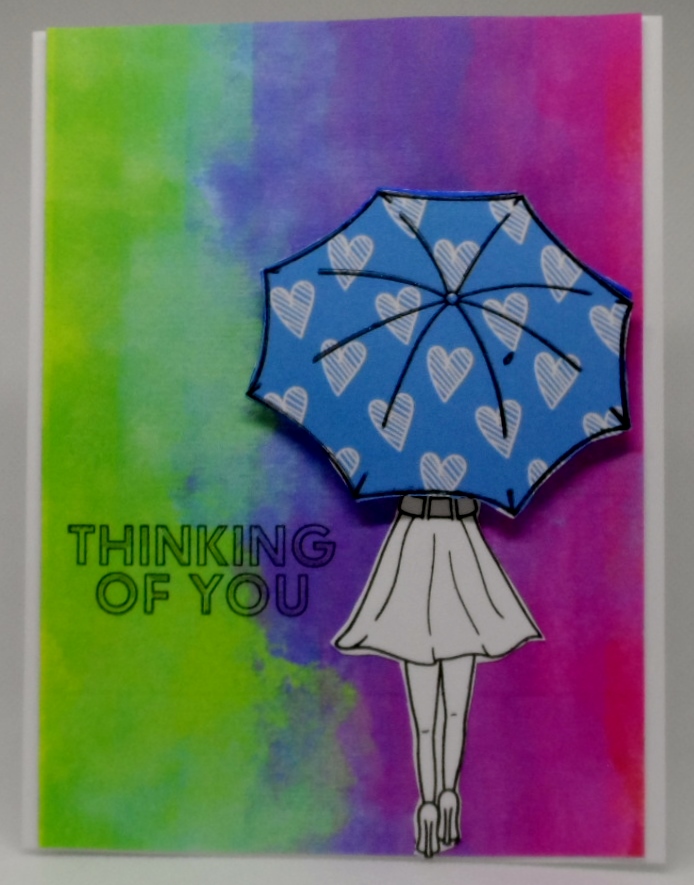
Nothing better than walking in the rain with a pretty umbrella especially when you realize that the end result could be a beautiful rainbow. I fell in love the the SSS Follow the Rainbows kit. The papers are gorgeous and the main image in the stamp set is the umbrella girl. So CASE-ing the SSS illustrations provided with this kit using a piece of this rainbow paper and a second piece of heart patterned paper fulfilled the Just Us Girls Challenge #538 — Wild Card Week Using 2 or more different patterned papers. I stamped and fussy cut the umbrella girl and then stamped and fussy cut the umbrella one more time popping it up and added a sentiment from the same stamp set.
This is for the Color Throwdown challenge to use turquoise, black and white. I colored the Gerbera Daisy background from Simon Says Stamp in Copics: B01, B45, B49, YG01, YG25 and N7. I trimmed the panel down and cut the stitched scallop edge in Black Onyx. The sentiment, from Hero Arts, was die cut four times from Black Onyx for dimension.
For the last couple of weeks The Stamp Simply Blog has been featuring their new set Old Glory with matching dies. I ordered their Patriotic Bundle Trio, that included Patriotic Sentiments, an older set that works perfectly with Old Glory. My stamps and dies arrived yesterday and I just had to play. I love how the USA map is shown with Old Glory waving across it. It’s fun to color too – Copics R27, R24, B39 and R24. I die cut the map with the matching die, then matted it with Blue Denim and Red Hot on a Kraft card base. The sentiment was embossed in gold. I discovered this will work for the Kraft Chicks All Occasion Challenge. Independence Day is a holiday I don’t create many cards for and I’m hoping to change that with these new sets. I’m also entering The Sisterhood of Crafters Favorite Technique Challenge because two of my favorite techniques are coloring and heat embossing. This works for Double D Challenge – Begins with M (Map) too and I’m getting in just under the wire.
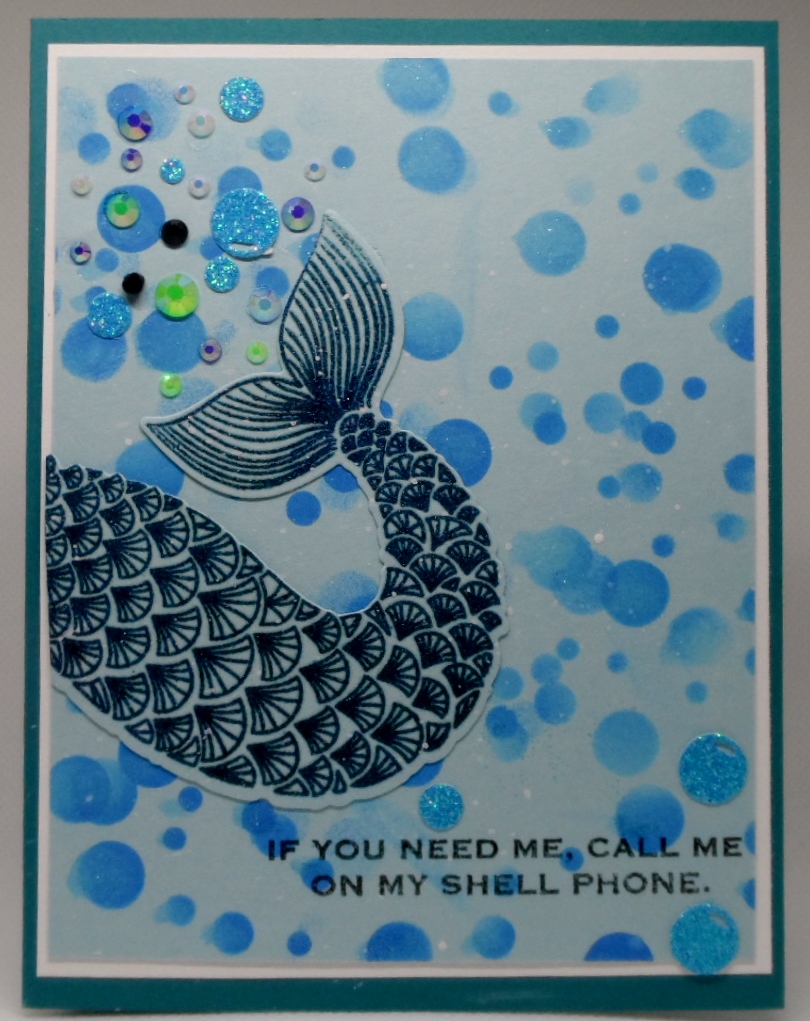
Begins with “M” for the Double D Challenges would be my mermaid tail by Julie for Essentials by Ellen stamp set and dies. I stamped my “M” tail in versamark on GKD Ocean Mist cardstock and heat embossed using some Ranger Antiquities Cobalt embossing powder. After die cutting the tail and using the bubbles die to create my stencil, I sponged on some Distress Oxide Salty Ocean ink, added some gem stones and glitter paper bubbles, too. Cute sentiment is from the same stamp set and all was mounted on GKD’s Blue Lagoon cardstock.
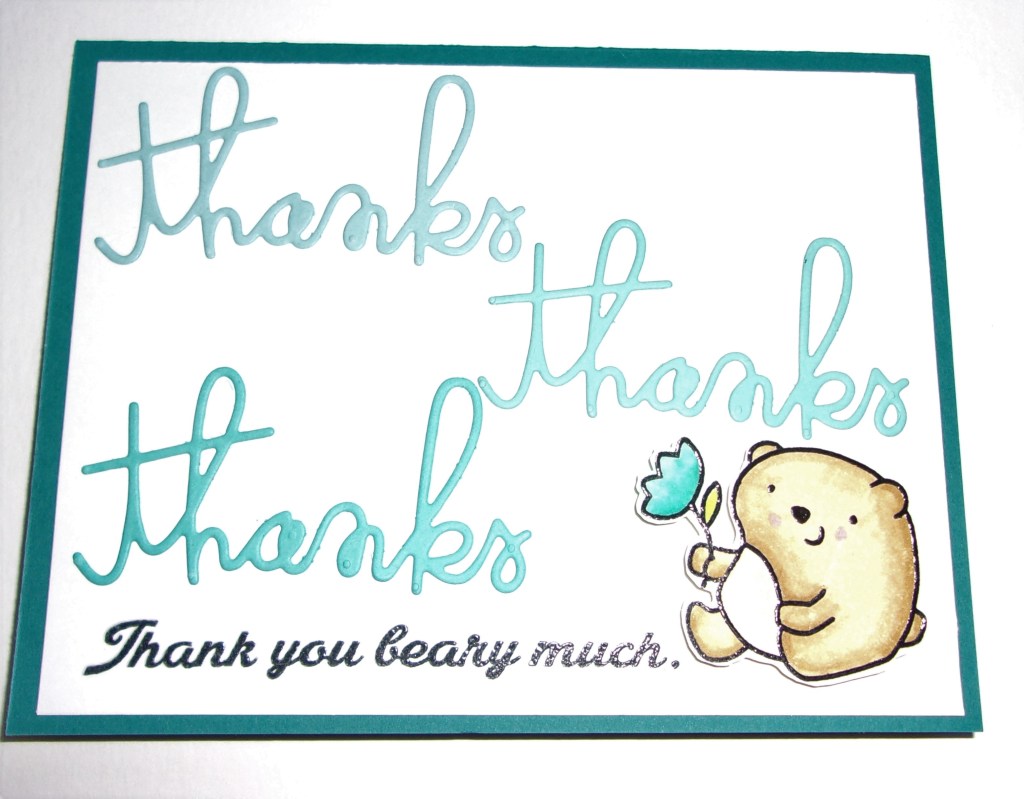
I used the sets Courteous Cuties and Courteous Cuties 2, along with the Thanks Word Die to complete the card. The paper is from Gina K Designs in the gradient of turquoise colors: Sea Glass, Ocean Mist, Turquoise Sea, and Tranquil Teal for the cardbase. The white is Hobby Lobby 110 pound heavy cardstock.
I love the set with the bear and the sentiment set that matches. The class lesson was to use a repeating die or stamp set in creating a rainbow of words. I thought the gradient colors worked for this idea.
Beautiful Butterflies is the name of the June Kit from Simon Says Stamp. The butterflies are beautiful and such fun to color. This is a case of Suzy Plantamura’s card. I colored the butterflies with Prismas: PC918 Orange; PC939 Peach; PC1096 Kelly Green; PC1038 Neon Pink; PC993 Hot Pink; PC942 Yellow Ochre. I used the same pattern paper Suzy used. Instead of black gingham ribbon (which I didn’t have) I cut a ¾” strip of black cardstock and embossed the sentiment from the kit in white. I affixed the PP together and added the black strip before adhering to my card base. All of a sudden I noticed the butterflies in the PP were flying upside down. I was able to very gently remove the sentiment strip and flip the panel so the green dotted paper was on top. After adhering it to the card base, whoops – the panel was crooked. I very carefully removed it and was able to even it up by trimming a sliver with my Tim Holtz trimmer. Got a little glue under the plastic guard, but was able to clean that. Glad I was using Nuvo Deluxe Adhesive – it is really forgiving. In spite of all the bloopers that happened I’m really pleased with the result.
I needed more space for the following card, so I went with a slimline card. I have made a card with these dimensions before, but the word slimline was never part of the description, just to fit into a business size envelope.
Tortoise outside Tortoise inside
I used the newest club set from The Stamps of Life, called tortie2stamp. Tortoise eat dandelions, so I stamped several to fill in the background. This was a joy to create. I am always looking for a new idea each year and this was a winner.
I have been creating cards for challenges on Split Coast Stampers lately. Here is a card for the MISTI challenge and a Thursday challenge.
Butterfly Window
This month’s MISTI challenge is to make a summery window card. Then there was a Thursday challenge to make a one-layer card, so both challenges work perfectly together.
The windows were cut with SU dies that match the Butterfly Basics stamp set and the Watercolor Wings set, all retired product. I began with the windows then placed the matching butterfly in front of the window opening in my MISTI. I opened the card front and leaving it flat. I stamped the butterflies in bright colors. Then closed the MISTI, laid the body on the butterflies, then opened the card again to stamp it. I wanted the body there, but not on the colorful images. I added a flower from the Layered Daisies set from Gina K Designs along with the sentiment. I popped the small butterfly on the flower and walked away.
I came back the next day or so, kept looking at the white background and didn’t like it. Then I remembered a cloud stencil, from Bonnie, that worked perfectly. I added blue clouds to the sky, then needed green for grass. I didn’t have a grass stencil and didn’t want to keep thinking of ways to get grass and leave the card flat. I have a punch and a die, but both will give elevation to the grass and I was thinking I didn’t want dimension on the grass, so I used the cloud die. I thought it gave the illusion of grass.
I like the card. It took a while to finish, but I think whoever I send it to will enjoy it. Thanks for reading my process.