Progressive Cardmaking 2 Day 1

I am taking Progressive Cardmaking Class 2 with Justine Hovey at Altenew Academy. Each day covers 3 levels, beginner, intermediate, and advanced. As time permits, I hope to try all three of the ideas presented. Here are the cards I completed with Day 1.

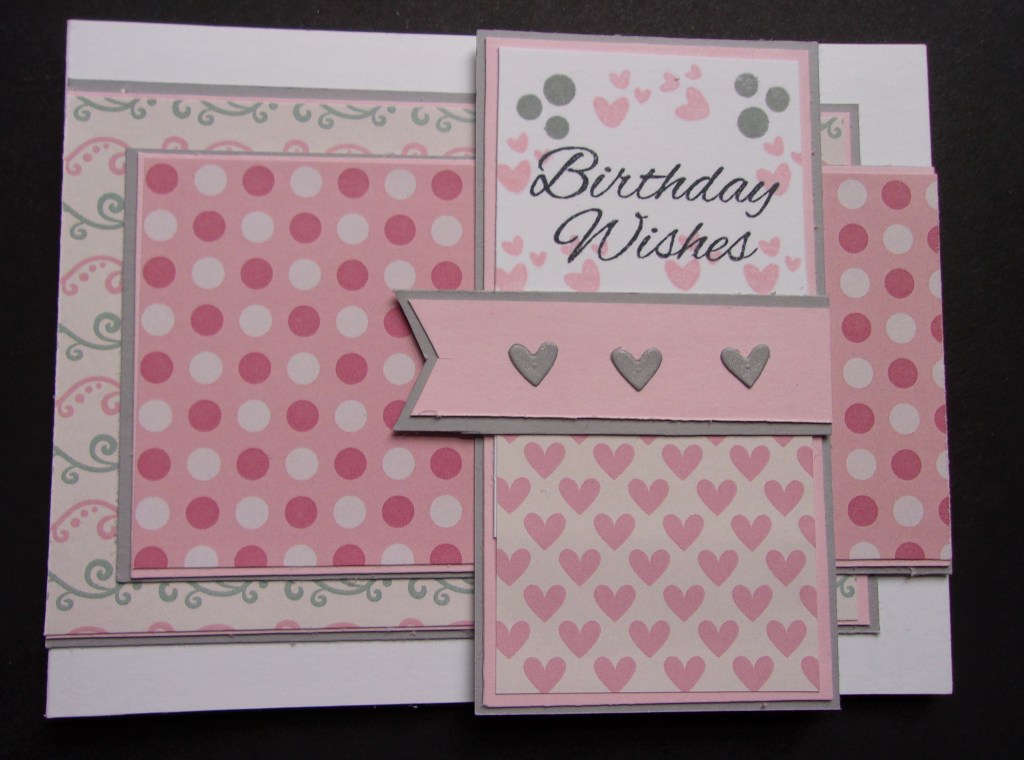
The lesson for beginner showed using a stencil to color a vine. I do not own stamps and stencils that go together, so I chose a vine and colored the leaves with an alcohol marker. Then the lesson took the vine and cut it in pieces, then spread these out over a piece of cardstock. I trimmed my vine down, cut it into pieces, then added the greetings like shown in class. The first two greetings are from a SU set, and the last greeting is from a My Favorite Things set. As all pertained to birthday greetings, I thought they work together. I thought the black mat was a good addition to the card. The vine is from Gina K Designs. I am fairly sure all stamps used are retired except for the MFT one as it is still available in the store.

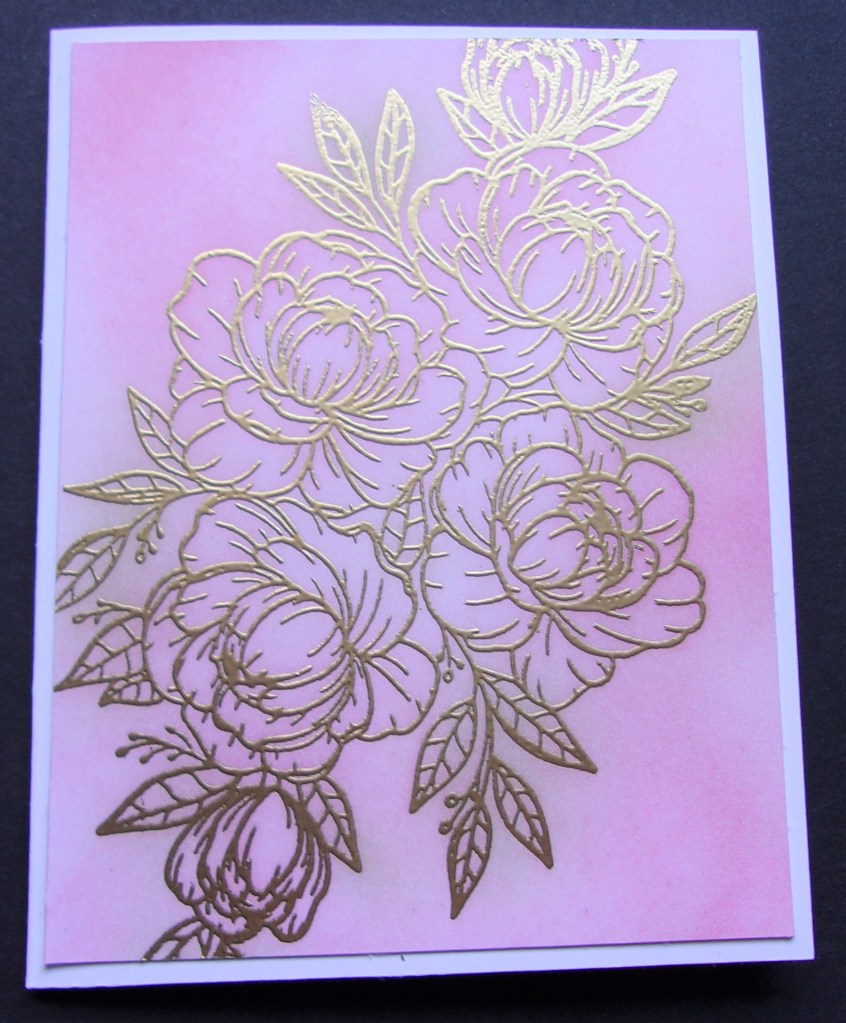
Emboss resist is the coloring method for intermediate stampers. Justine chose a large floral and embossed in white powder, then ink blended. I chose to emboss in gold as I knew it would pop, and it was laying there. I pulled out rose colors for my ink blending, all Lawn Fawn inks. I mounted the layer on white cardstock. Justine added a die cut greeting, but I think mine works without a greeting.

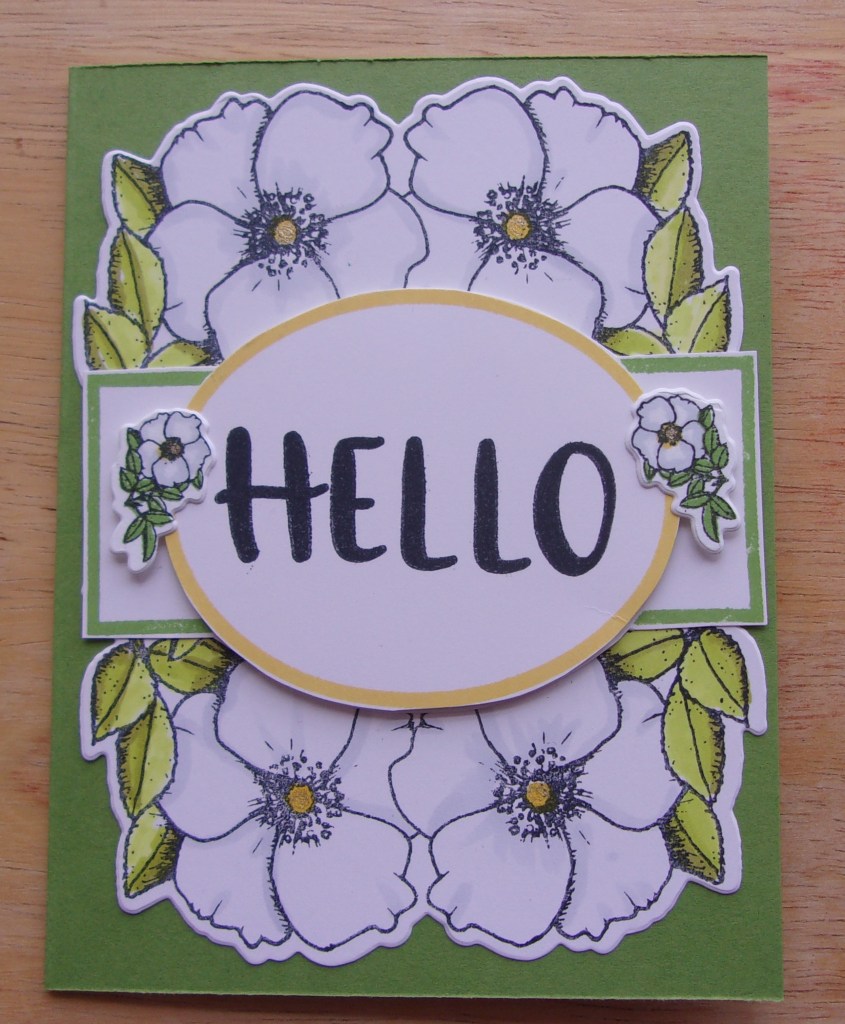
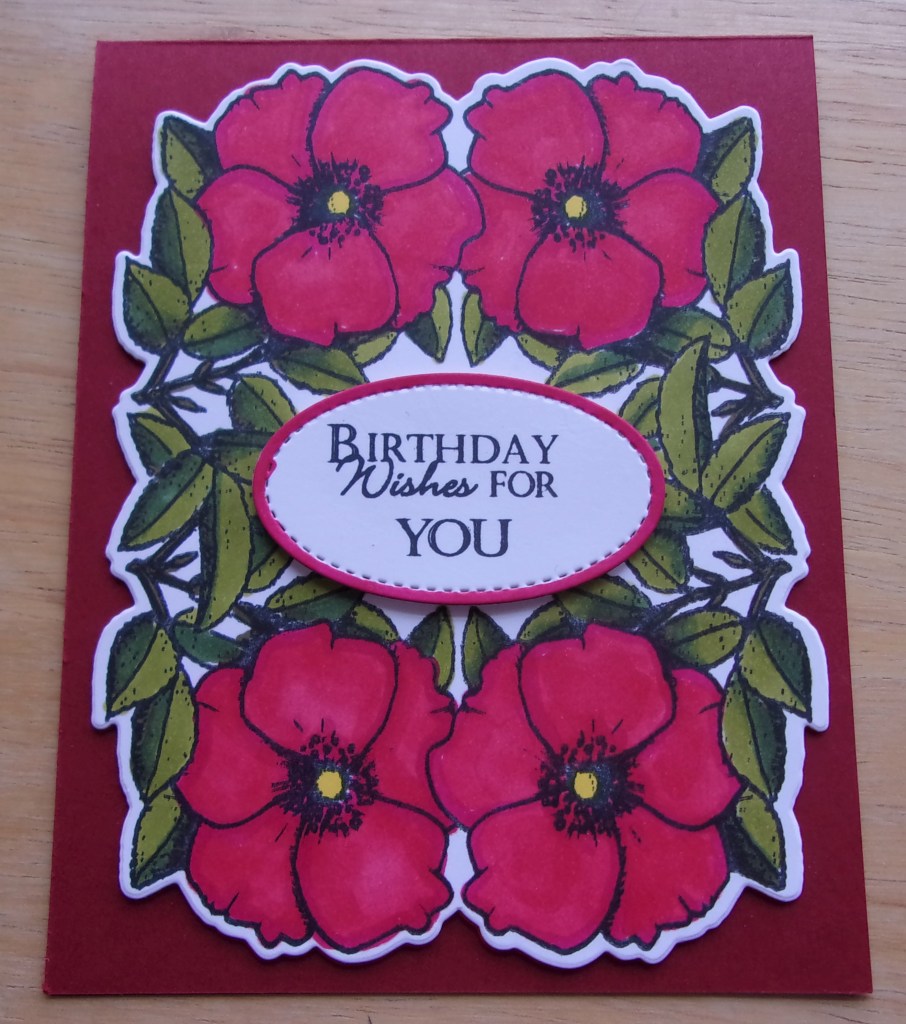
Masking was the Advanced Technique. I chose to use a stamp set from My Favorite Things and I have the die that matches the flowers. I used Gina K Designs masking paper and die cut the floral, then covered my floral before adding color. In class, Justine made a frame for the are around her flower. My flowers are larger than hers, so I added strips to the sides of the paper before adding color. I stamped this on watercolor paper and applied watercolor paint, rather than ink blend. The I added a die cut greeting as I think it needed something.

I am enjoying the class. I am sure I will learn new things to apply to my cards.

MSC Bear with Heart

The following slimline card is for the Mod Squad Challenge All About Love.

https://modsquadchallenge.com/all-about-love/

The Gina K Designs image used on this card is the bear. I altered it to hold a heart, rather than the pumpkin it stamped with. His scarf is paper pieced to match the paper used in the hearts. The heart the bear is holding is from the set hearts2diefor from The Stamps of Life. The hearts dies are also The Stamps of Life, Love/Heart dies. The background is stenciled with a SU stencil. I enjoyed creating something different using something that I owned, specifically the bear. I had never masked what the bear is holding and having an image that fit perfectly worked great.

Bugs and Flowers

I received this stamp and die set in December, but I was busy with Christmas so it had to sit for a while. Then I stamped several images and slowly added color. Many were watercolor and a few colored with alcohol markers. Following are several cards using the bugs, flowers, and buddy sent flower pots. I still have several flower pots and I have a new idea in my head, so stay tuned as I continue to use these.

Bugs and Flowers in the Flower Pot

This is the card I had in my head to create with a flower pot. I was blessed with this flower pot fold-it die cut. I used a gifted piece of patterned paper for the bottom of the pot. This card will be posted to the January Use Your Stash group challenge. The challenge is to make a card with flowers and/or hearts and I am the hostess for the challenge. I had no ideas in my head when I came up with the challenge and now, my head seems to be swimming with ideas.

Stamps used are lovebugs2stamp and morelovebugs2stamp from The Stamps of Life along with matching dies. The patterned paper is from Gina K Designs.

Flowers in a Pot Slimline

This card is using another gifted flower pot. The base is covered with patterned paper from Gina K Designs. The top has patterned paper from The Stamps of Life and the fence and clouds uses patterned paper from Hobby Lobby. I even found ribbon that blended well with the flowers. I started with the flower pot and flowers then decided what to do with it. I had fun with this once I had an idea.

Sending You Love

This bug is so fun in the window. This card is using most items from The Stamps of Life. I saw this idea in the gallery on TSOL website.

Thanks for looking at my bug cards. I enjoyed creating them.

Swap card

I decided to participate in a January swap with a small group of ladies. We chose a card to CASE. Here is the card we used: https://www.pinterest.com/pin/320459329741601423/

Following is my card.

Ladybug Hug front
Ladybug card inside

I used stamps from The Stamps of Life, ladybug2stamp and moreladybugs2love along with matching dies. The card we used has flowers and I decided to use something different. I love the ladybugs and was so happy to use them as it has been quite a while.

Sheetload of Cards January Number Three

I made one more card for January Sheetload of Cards. I have enjoyed the sketch provided and have really enjoyed using what I have to create lovely cards.

Sheetload Cards Number Three#suysjan2021

Here is Crafty Al’s playlist showing the January Sheetload of Cards videos: https://www.youtube.com/playlist?list=PLOjF4zwVYrxlwBr-_ap48WPrCvVn5R71U

I used Gina K Designs products for this card. I have had this patterned paper for a few years, so I decided to use it for this card layout. It came with the Flowers and Frames kit as did the stamp sets used. I had this rose stamped, die cut and placed with the set waiting to be used. I think it works wonderfully to add something to this card.

Fabulous Rose Frame in Yellow

When I stamp one frame, I usually stamp two. Both images stamped well, so I made two cards. This card was created for the MISTI challenge at Split coast Stampers. The challenge was that the card needed to have Yellow and say Hello. It could have other elements from the original card posted, but those were the two main elements.

https://www.splitcoaststampers.com/gallery/photo/3023123?&cat=500&ppuser=301308

I used the Fabulous Rose Frame with matching dies and the Amenome Wishes sets from Gina K Designs. I watched Melanie Muenchinger’s videos to learn how she colored the roses and ways to use the set. I made the belly band with Freshly Cut Grass ink from Lawn Fawn, then thought the card needed more yellow. I stamped another one from Sunflower ink, also from Lawn Fawn. The yellows all coordinate, even though the rose centers were stamped in GKD Wild Dandelion ink. I like the belly band with both colors showing. In enjoyed coloring the rose and leaves images.

Happy Birthday in Red

This month’s Monthly Mix Challenge at Gina K Designs is to use Red and make it a celebration card. I chose to stamp and create with the Fabulous Rose Frame illustrated by Melanie Muenchinger. I loved this frame set when it was first introduced in 2017 and it has recently been retired and placed on the Clearance rack. I was fortunate to be able to make the purchase.

https://ginakdesigns.com/2021/01/01/january-2021-monthly-mix-challenge/?v=7516fd43adaa

I stamped the image, using my MISTI, on Spectrum Noir White cardstock. I used Spectrum Noir markers to color the images, then cut it out using coordinating dies. The oval die is from Stampin’Up and it fit well in the frame. I know this will go to someone who has a February birthday as it is red.

Royal Peacock

Each month I participate in a Faith Based challenge. This month the verse selected was from me. I chose the verse Psalm 91:4 which is about God taking care of each of us. The verse talks about Him covering us with His feathers, so of course feathers was a main image.

I found the verse printable at this site: https://www.sincerelysarad.com/category/printables/featured-printables/

The peacock and feathers are from Stampin’Up Royal Peacock (retired). This is the first time I actually inked and used the dies. I have had it for several months, but never used it so was excited to create with it. I used DCWV foil papers for the background and feathers. The background is embossed with a Cuttlebug embossing folder. I just saw Buddy Bonnie’s card and noticed the verses have a similar thought, so that prompted me to finally get this card posted.

SheetLoad of Cards January

I have been watching “call me Crafty Al” for a while on YouTube. I will link her January playlist: https://www.youtube.com/playlist?list=PLOjF4zwVYrxkvs_TN2Ll0BuJjbjZI8OYN

I made two cards with her January sketch using 6 X 6 paper from Gina K Designs.

#SUYSJan2021

Here is card number two:

#SUYSJan2021

Al shows her process and give instruction through her videos. At the end of the first video, you can download her sketch. This was my first time creating from her sketch. I may do this again using 12 X 12 sheets of paper, which is what her cutting layouts are based on. I have an abundance of 6 X 6, so I pulled out a few sheets, found coordinating cardstock and created two cards. I enjoyed the process as it was different. Thanks for looking!